
Winter landscapes have a magical, serene beauty, and painting them with watercolor is a great way to capture that peaceful atmosphere. In this tutorial, I’ll guide you through a simple 4-step process to create a snowy pine forest scene using only two watercolor colors and white gouache. This quick and easy method is perfect for beginners and can be completed in just 15 minutes!
Materials You’ll Need:
- Watercolors (I use White Nights, only 2 colors: Indigo & Payne’s Gray)
- White Gouache (for snow details)
- Two Brushes:
- Mop brush (for the background wash)
- Round brush (for pine trees and snow details)
- Watercolor Paper
- Water jar & tissue
Step 1: Create the Winter Sky Background
📌 Wet the background with Indigo, then add Payne’s Gray at the top
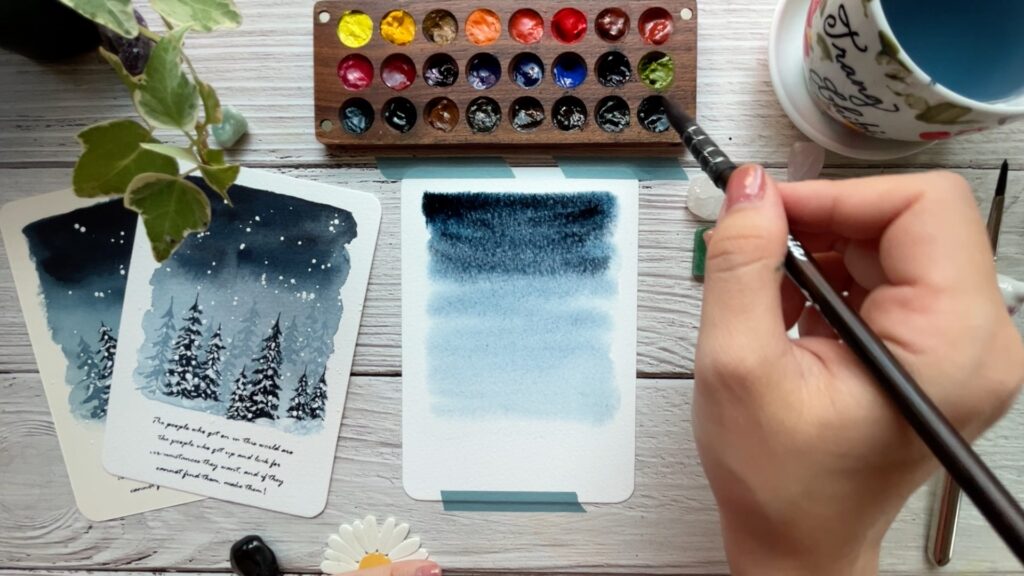
Start by wetting the entire surface of your paper with clean water. Then, using a mop brush, apply Indigo from the bottom up, creating a gradient effect. While the paper is still wet, introduce Payne’s Gray at the top to darken the sky and create a soft transition. Let the paint blend naturally to achieve a moody winter night effect.
Step 2: Paint the First Layer of Pine Trees
📌 Use diluted Indigo to paint the first layer of trees
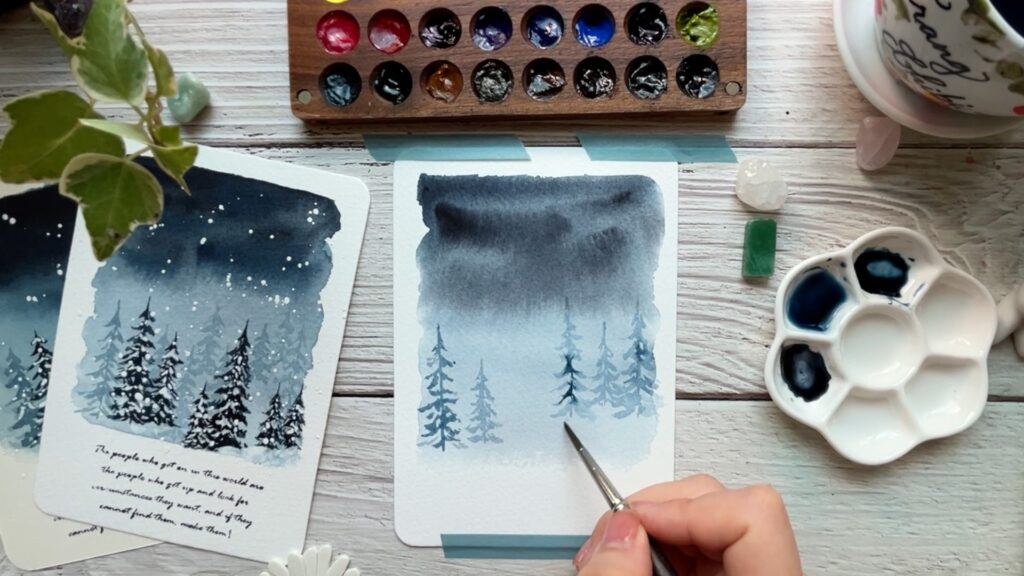
Once the background is dry, take a round brush and use a diluted mix of Indigo to paint distant pine trees. Keep these trees light and subtle to create a sense of depth. Use short, flicking brushstrokes to form the texture of pine needles.
Step 3: Paint the Foreground Pine Trees
📌 Use Payne’s Gray to add the second layer of trees
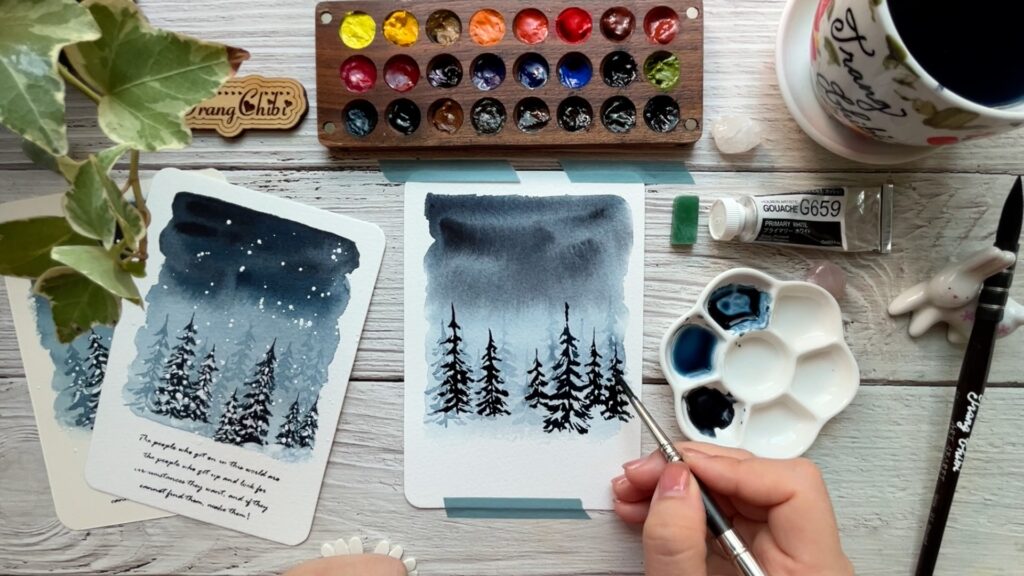
Now, mix Payne’s Gray with less water to create a darker tone. Using the same round brush, paint the foreground pine trees with more defined details and stronger contrast. These trees should be bigger and darker, as they are closer to the viewer. This layering technique helps create a sense of distance and realism.
Step 4: Add the Snow Details
📌 Use white gouache to add the snow
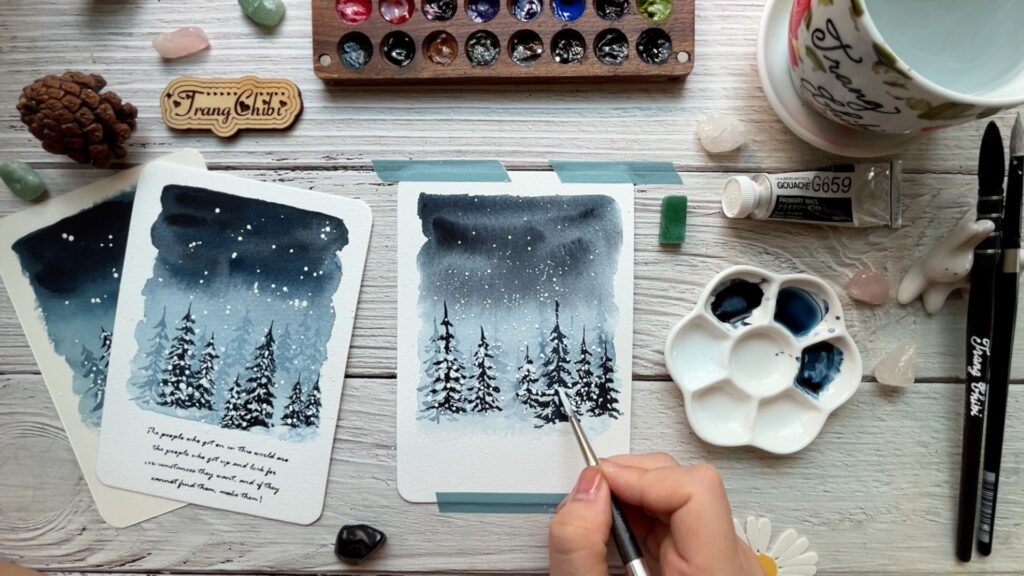
Finally, it’s time to bring the winter magic to life! Using white gouache, gently tap the round brush to create snow on the pine trees and sprinkle small dots in the sky for falling snow. This simple step adds depth and realism, making your winter landscape feel truly complete.
Final Thoughts
And that’s it! In just 15 minutes, you’ve created a stunning winter landscape painting using minimal colors and simple techniques. This method is beginner-friendly and can be customized by adding more trees, adjusting the sky, or even experimenting with different color palettes.
📺 Watch the full time-lapse video on my YouTube channel! 📚 For a more detailed, step-by-step class, check out my courses on Skillshare.
Happy painting! ❄🎨